
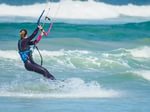
There’s nothing quite like kiteboarding: soaring across blue water as the wind whips your hair and the sun hits your face; the sense of weightlessness and freedom as you float across waves; the two-part sensation of hitting speeds that feel both effortless and terrifying — it’s no wonder people get hooked.
Kitesurfing isn’t a sport you master overnight and most beginners log dozens of hours before even standing up on a board
Before experiencing that magic moment — where you decide to drop everything and move to Baja — there’s a rather lengthy learning curve. Kitesurfing isn’t a sport you master overnight and most beginners log dozens of hours before even standing up on a board. First, you must learn how to harness the wind and control the kite to your advantage. As a new kiter, you’ll spend hours “body dragging” across the water, tacking back and forth to learn how to get around — there’s no wonder there’s an entire dedicated section of kitesurfing equipment for beginners.
Plus, you need heaps of gear to start and this is easily the most daunting part of learning. There are lines and bars, leashes, safety releases, harnesses, and chicken loops — and that’s before you even get to the board or kites. The tangle of equipment is enough to make one’s head spin and causes otherwise enthusiastic riders to drop the sport before starting. To help, we’ve broken down each piece of gear to help you understand everything you need to get out on the water.
Gear check-off list:

Basic gear (Required):
- Harness
- Control Bar, Lines & Leash
- Board & Straps
- Kite(s)
- Pump
Safety apparel (Recommended):
- Wetsuit
- Helmet
- Booties
- Impact Vest
Harness
This is the piece which secures to your waist to harness you to the kite — and is arguably the most important piece of gear. There are two types of harnesses: seat harnesses and waist harnesses. Seat harnesses feature straps which go between your legs — much like rock climbing harnesses — whereas waist harnesses fit more like a thick belt. For most new kiters, deciding which style to buy can be tough.
Much of it comes down to personal preference — you want to make sure you have one that fits right and feels comfortable. However, most experts agree a seat harness is the preferred first option since beginners spend a lot of time with the kite straight overhead which tends to make the harness ride up. The leg straps help prevent this from happening and offers additional support.
Seat harnesses do allow you to sit back a bit more which some people argue leads to bad form — something you certainly don’t want to establish as a beginner. As you progress, you’ll likely transition to a waist harness due to its increased flexibility and freedom.
There are also a number of hybrid harnesses on the market which are essentially waist harnesses with removable leg straps. This is a great option for beginners who want to start out with the extra support but have something you can grow into.
Our pick: Dakine Renegade Hybrid
Control Bar, lines, and leash
The control bar is the epicenter of your kite control and safety features. It’s absolutely critical to have a stellar system here with the most up-to-date technology you can afford. This not only keeps you safe but also has an enormous effect on your enjoyment of the sport. The more ease with which you can control your kite, the quicker you’ll be able to focus on riding.
The system is composed of a bar to hold onto, lines which connect it to the kite, and a safety leash that allows you to detach yourself in an emergency without losing the kite. If you purchase new gear, these three things typically come together in one package. Different systems offer different features such as the ability to power up or de-power the kite, integrated untangling systems (something that happens a lot at the beginning), and other technical attributes.
With the bar itself, the main thing to consider is that it’s fairly lightweight, responsive, and has a comfortable grip. As for the lines, your main focus should be on how long they are.
For a beginner, shorter lines — around 15 meters — are the best choice
“Line lengths play a huge role in the sport,” said John Zimmerman, General Manager of Ocean Rodeo. “Shorter lines result in less overall power in the kite and a faster turning, more responsive kite. Longer lines create more apparent wind and generate more power but result in a less reactive kite.”
For a beginner, he said, shorter lines — around 15 meters — are the best choice. The steering input directly transfers to kite movement, making it easier to control. For the safety leash, try to avoid anything too long and make sure to always hook to the front of your harness so you don’t risk getting pulled backward by the kite upon ejection.
Note: Safety leashes (that hook to the kite) should not be confused with board leashes. Board leashes are not used in kiteboarding and attempting to rig one up can be extremely dangerous and potentially fatal.
Our pick: Cabrinha Overdrive 1X
Board and straps

Ocean Rodeo/Facebook
For a beginner, common wisdom is that bigger boards are typically easier to ride. However, a board that’s too big can be much tougher to maneuver in heavy winds. Plus, if you’re serious about the sport, you’ll quickly outgrow a behemoth of a board. The key is to find a balance between your current need for ease, with performance you can grow into.
The first thing to consider is your size and weight. A general rule of thumb is that smaller riders (under 150 pounds) should look for one sized at 136- to 148-centimeters, medium riders (150 to 200 pounds) 145-to 160-centimeters, while larger riders (over 200 pounds) want one at 150-to 165-centimeters.
You also want to consider how strong the wind might be in your area and what kind of riding you want to do.
The lighter the wind, the bigger you want your board to be. So, this means if you live in a region with lighter wind, it’s best to add a couple centimeters to your board whereas if you’re going to be practicing in places with heavy wind, you may want to size down. If you plan to stay on mostly open flatwater to carve out basic turns, the numbers listed above are a perfect starting point.
For straps, there are two types: strap and pads and boot-style bindings. As a beginner, we recommend starting with a basic strap style which is essentially a padded cushion for your feet with a strap across it. Be sure to get something that feels comfortable barefoot and while wearing booties. You also want to make sure it tightens down enough to fit your foot but not so tight that you have trouble sliding your feet into them in the water.
Once you progress, you can decide if boot-style bindings — which are helpful when doing jumps and tricks — are right for you. Most new boards come with straps or recommendations. Once you have your board picked out, talk with a retail associate about which binding is the best fit.
Our pick: Ocean Rodeo Origin with Bliss Air Straps
Kite(s)
Picking out a kite is one of the trickiest gear decisions. Everything from local wind conditions, average temperatures, regional water currents and other weather factors — not to mention the size of the rider — factors heavily into this decision.
Kites measure in meters ranging from around 5 (small kite) to 18 meters (very large kite). Most kiteboarders end up owning around three kites, allowing them to ride the greatest amount of wind conditions — depending on how hard it’s blowing on any given day. Generally speaking, a light-wind kite (8-15 miles per hour) ranges from 14 to 18 meters, medium-wind kites (15-20 mph) range 11 to 13 meters, and high-wind kites (20-25 mph) range 5 to 9 meters. The sizes you pick within those ranges depend on how heavy you are — the more you weigh, the bigger your kites will need to be.
When choosing your first kite, the best thing to do is talk to people in retail shops, or other kiters in your area.
When choosing your first kite, the best thing to do is talk to people in retail shops, or other kiters in your area.
“Beginners are best to get advice for the local conditions from others in their immediate community,” Zimmerman added. “For most locations, a beginner can buy one kite for 60 percent of their needs and then expand to add a light-wind kite and, generally in their second season of riding, a higher wind kite. A more important consideration is to buy a kite designed to be forgiving.”
Zimmerman noted that “more forgiving” does not mean lower performance but simply something that’s stable, easy to relaunch, and that drifts well when the lines are slack.
Zimmerman also recommended that beginning kiters avoid buying used gear and niche kits which target specific disciplines.
“If their budget demands they buy used, (they) should seek the advice and help from a knowledgeable kiteboarder to aid in their buying choices,” he said. “One great option for buying used is to seek out ex-demo equipment from shops or brands. This gear tends to still be less than a year old and is often in great condition.”
Our pick: Cabrinha Switchblade
Pump

Pumps are fairly straightforward — this is what you use to put air into your kite. Pick one that boasts a large chamber so you can pump the most amount of air possible with each stroke, saving your arms from tiring out before you even start. Look for a pump with a durable hose, a secure connection to your kite (so it doesn’t fly away), and an accurate, easy-to-read gauge to track your PSI. There are many types of nozzles so it’s best to purchase your pump after your kite to be sure it has the correct adapter to fit your specific kite.
Our pick: WMFG Kiteboarding Pump 2.0
Additional equipment

Slingshot Kite/Facebook
On top of the basic gear listed above, it’s highly recommended you invest in a wetsuit and safety gear as well. This includes:
Wetsuit — Our pick: ProMotion Wetsuits
Helmet — Our pick: Mystic MK8 X
Booties — Our pick: Mystic Lightning Boots
Impact Vest — Our pick: Slingshot Team Vest
Learning the ropes

Kiteboarding Baja
Once you’ve purchased your gear, there’s one last thing that goes a long way in making the learning curve for kiteboarding a bit less steep: lessons. While it’s tempting to go out on your own to save money, it’s not recommended. Unlike other action sports, kiteboarding can be extremely dangerous, especially during the first few days. It’s imperative to have a professional walk you through your equipment and teach you the basics of safety and kite control. Not only will this keep you and others safer, it ultimately makes the sport more fun and aids your progression.
A minimum of nine to 12 hours with an instructor is ideal before venturing out on your own. Here are a few reputable kite schools in various regions of the United States:
Southern California
Ventura Kiteboarding
Columbia Gorge, OR
New Wind
Molly Kissinger Kite Instruction
South Padre Island, TX
Air Padre
ProKite
Cape Cod, MA
Air Support
Miami, FL
South Florida Kiteboarding
Baja, MX
Palapas Ventana
Kiteboarding Baja


Recent Comments