CPR is a core skill delivered on any First Aid Training Course. It’s a technique that gives you the ability to manually keep a person alive should they stop breathing and go unconscious.
Whether you are like us and work in the water sports industry, want to refresh your memory, or want to get a better understanding, learning how to do CPR is a great skill for anyone to have.
At Flying Fish we have an easy to remember formula which allows you keep safe and follow the steps to doing the right thing – DR ABC.
Danger
Response
Airways
Breathing
CPR
How to perform CPR
The following video shows how to carry out this procedure for a dry land casualty. Please be aware there is a different ratio of breaths to compressions for a suspected drowning casualty.
The first thing to consider is do they actually need CPR? Either way if you are not sure what’s going on with this person and it’s obvious that they are unwell it’s always best to recruit someone nearby to go for help or phone an ambulance. This is via 999 in the UK, 112 in Europe, 911 in USA and 000 in Australia. If no one is around you will need to make the call yourself before beginning CPR. The aim is to complete the 4 stages to the chain of survival quickly as possible to give the best chance of keeping someone alive.

If you find yourself in the position where you need to perform CPR, this can be stressful and many different thoughts can rush through your head. We teach a simple easy to remember formula that is designed to keep you safe and allow you to carry out the correct protocol. This follows the acronym DR ABC:
How to do CPR using the DR ABC method:
- Danger
STOP and check for danger.
If you have just arrived on the scene you may not be aware of what caused this person to be on the floor and the same thing may happen to you! YOU (the first aider) are the most important person here and that can be easy to forget. You need to remove all danger, e.g if there is evidence of electric shocks, then get the power turned off before going any further.
If you can’t remove the danger then you will need to remove the casualty from the danger. Common danger spots include busy roads or water.
- Response
Always try to approach a casualty from the feet upwards try to gain an idea of what’s going on.
Kneel down beside their shoulders and speak clearly and loudly into each ear (they may have hearing impairment). Lightly tap the person on both shoulders and see if there is any response at all. If you see or hear nothing now is the time to SHOUT FOR HELP.
- Airway
Opening the airway is the essential next step.
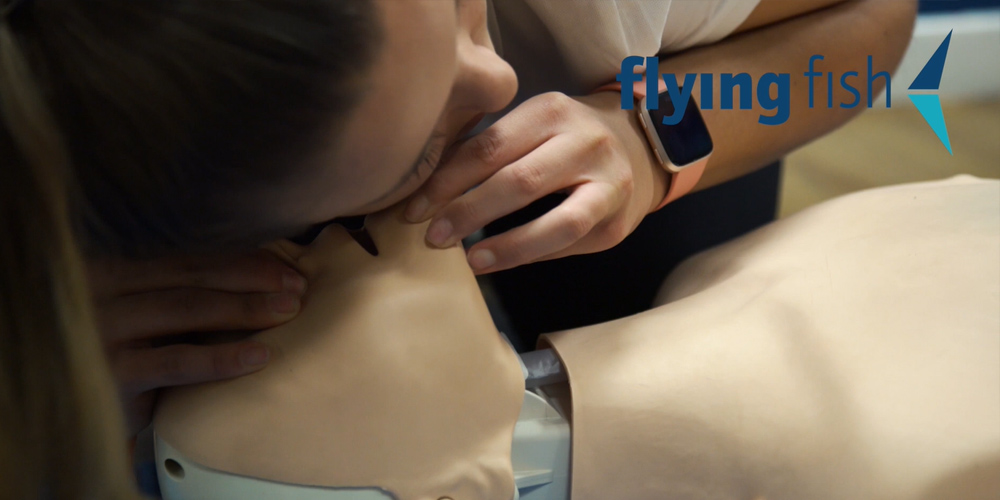
The casualty may have just fallen in a slumped position with their chin down over their chest limiting their airway. Place your hand on the top of their head and with two fingers under the chin tilt the head back. This will allow you to have a look into the airway see if anything is blocking it or see what it smells of.
- Breathing
After the airway has been opened properly you will be able to find out if the person is breathing or not.
You are looking for normal rhythmic breathing here which means 2-4 breaths within 10 seconds for an adult.
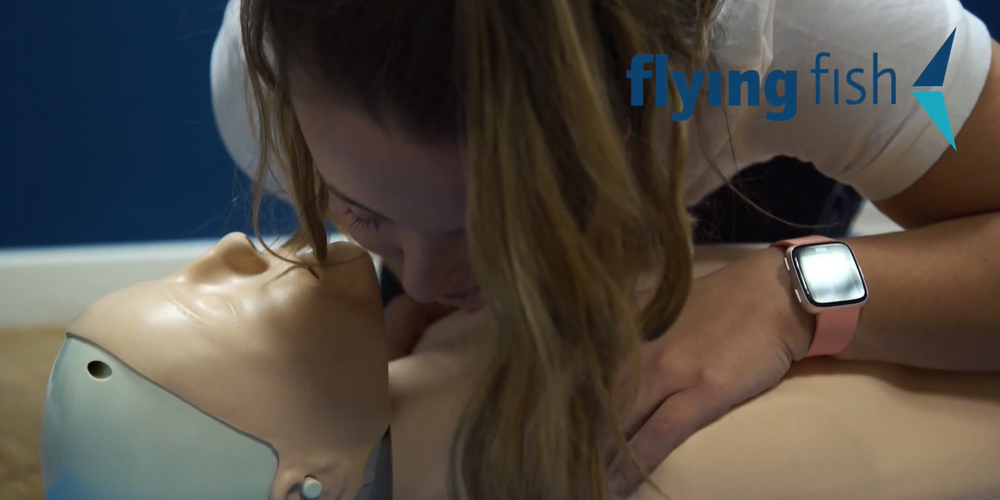
Place your cheek over their nose and mouth, using all of your senses for this test; look down the chest, listen and feel with your cheek and one of your hands on their stomach. This is an important point, in modern first aid terms if they are not breathing they are dead and it’s now time to make sure an Ambulance has been called and start CPR.
If you do find normal rhythmic breathing that hits your cheek with power then you DO NOT need to do CPR but instead roll them into the recovery position.
- CPR
CPR should begin in a situation and a position where it will not need to be stopped before a medical professional arrives.
The surface should be firm and the area clear of obstructions. With your hand in the middle of the chest, place your other hand on top of the first, interlock your fingers and press down 5-6 cm.
Perform 30 compressions at a rate of 100 – 120 per minute.
After 30 compressions, open the airway again and give 2 rescue breaths. Continue with chest compressions and rescue breaths at a rate of 30:2 until help arrives.
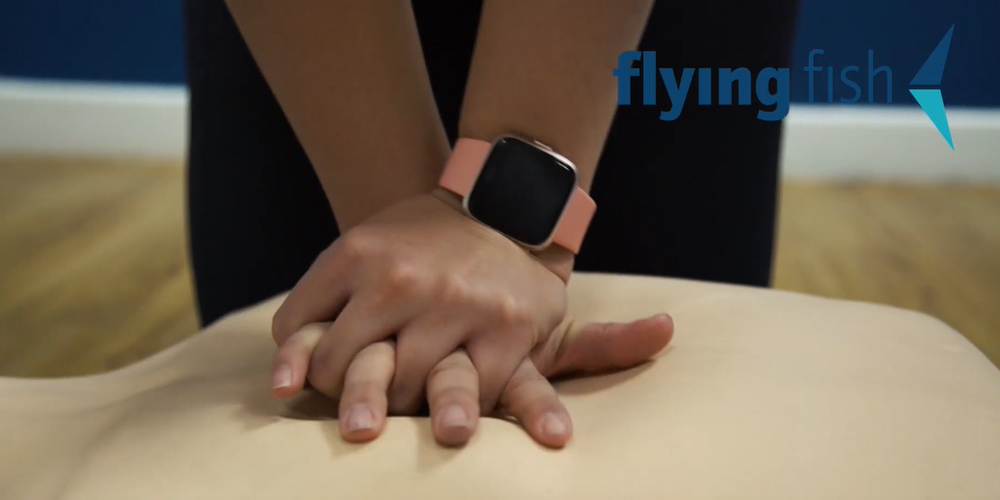
Compressions are the most important thing! The likelihood is that the blood still has some oxygen in it and just needs to be circulated to the brain. Do this by placing the heel of your hand on the centre of their chest, interlock the fingers of the other hand over the top. Then with straight arms compress their chest 5/6 cm by using the weight of your shoulders over the chest. All compressions in modern first aid are now 30 at a time, and should be performed at a rate of 100/120 beats per minute.
Performing rescue breaths should be done by tilting the head back and opening the airway, pinching the nose and making a seal over their mouth with yours. It only needs to be a normal breath for that size of person, not a huge lungful. Too much air can inflate the stomach and course involuntary vomiting later on. Ideally you will see a visible rise and fall of the chest.
If you have a first aid kit to hand you may find either a “face shield” (plastic sheet with protective gauze in the middle) or a “Pocket Mask” (rubber tear drop shaped mask). We highly recommend using either type of protective aid as it can protect you from any form of vomit or diseases and add a higher level of professionalism making it easier to swap with a teammate as well.
Dry land casualty: 30 compressions to 2 breaths
If you find an adult not breathing on land the most likely occurrence is that they have a heart related issue. Therefore, the protocol is to do 30 chest compressions followed by two rescue breaths. Make sure the ambulance has been called and if available get the AED plugged in as soon as possible.
Suspected drowning casualty: 5 breaths followed by 30:2
If someone has stopped breathing via asphyxia (drowning) then they may be in respiratory arrest. Giving 5 rescue breaths first allows the best chance for them to begin breathing again. If this does not work then it at least puts extra oxygen into their deprived system.
Follow on with the normal 30 compressions to 2 breaths after this. If available get the AED plugged in as soon as possible and make sure the ambulance has been called.
Youth casualty: 5 breaths followed by 30:2
A youth is identified as someone who has not yet been through puberty. These young people statistically have strong hearts meaning that it is more likely to be a breathing issue. Therefore, the procedure is to do 5 normal sized successful rescue breaths followed by 30:2 repeatedly.
When carrying out the chest compressions it is advised to use only one hand to compress the chest to 1/3 of its depth. Make sure the ambulance has been called and if an AED is available use it. Be aware you may need to use different pads if the casualty is under 8 years old or 55lbs.
Baby casualty: 5 breaths followed by 30:2
Make sure an ambulance has been called and move the baby onto a hard flat surface.
When opening the airway DO NOT tilt the head far back as with an adult, instead aim for a neutral position. Place your mouth over the infant’s mouth and nose and give just enough air to make their chest rise and fall 5 times. Compress the chest using two fingers located on the centre of the breast bone, 30 times at a rate or 100/120 bpm, follow this with 2 breaths and repeat. If available use an AED with infant pads as soon as possible.
Remember it’s better to do something rather than nothing at all. Always work as a team and utilise the resources around you.
What does CPR stand for?
CPR stands for Cardio-Pulmonary Resuscitation; Cardio being the heart, Pulmonary the breathing system and resuscitation means that you do it for someone else. The point is to manually pump oxygenated blood to the vital organs (heart, brain and lungs). This means at the very least you are keeping the brain alive and stopping brain damage from occurring.
The best possible outcome is that they show signs of life and begin coughing and spluttering, this is however quite unlikely. So therefore your job is to utilise all resources around you including other qualified team mates to continue good quality CPR until professional medical help arrives.
The best possible outcome is that they show signs of life and begin coughing and spluttering, this is however quite unlikely. So therefore your job is to utilise all resources around you including other qualified team mates to continue good quality CPR until professional medical help arrives.
You may may find that you have access to an AED (Automated Electronic Defibrillator), in which case this should be utilised as soon as possible. The earlier the defibrillator is connected to the casualty the more likely the machine will find some activity in the heart (ventricular fibrillation: imagine the heart wobbling like a bowl of jelly) which it can shock back into a beating rhythm.
Get first aid qualified
At Flying Fish we run first aid training, which is included on many of our water sport, yachting and super yacht career courses. However if you just need a refresh to update your certificate, a quick Google search will give you a list of training courses in your local area.


Recent Comments